Luer Lock for Dummies
The threaded connection that keeps your needle from popping off — explained in plain English, with pictures. No jargon, no assumptions.
So what is a luer lock?
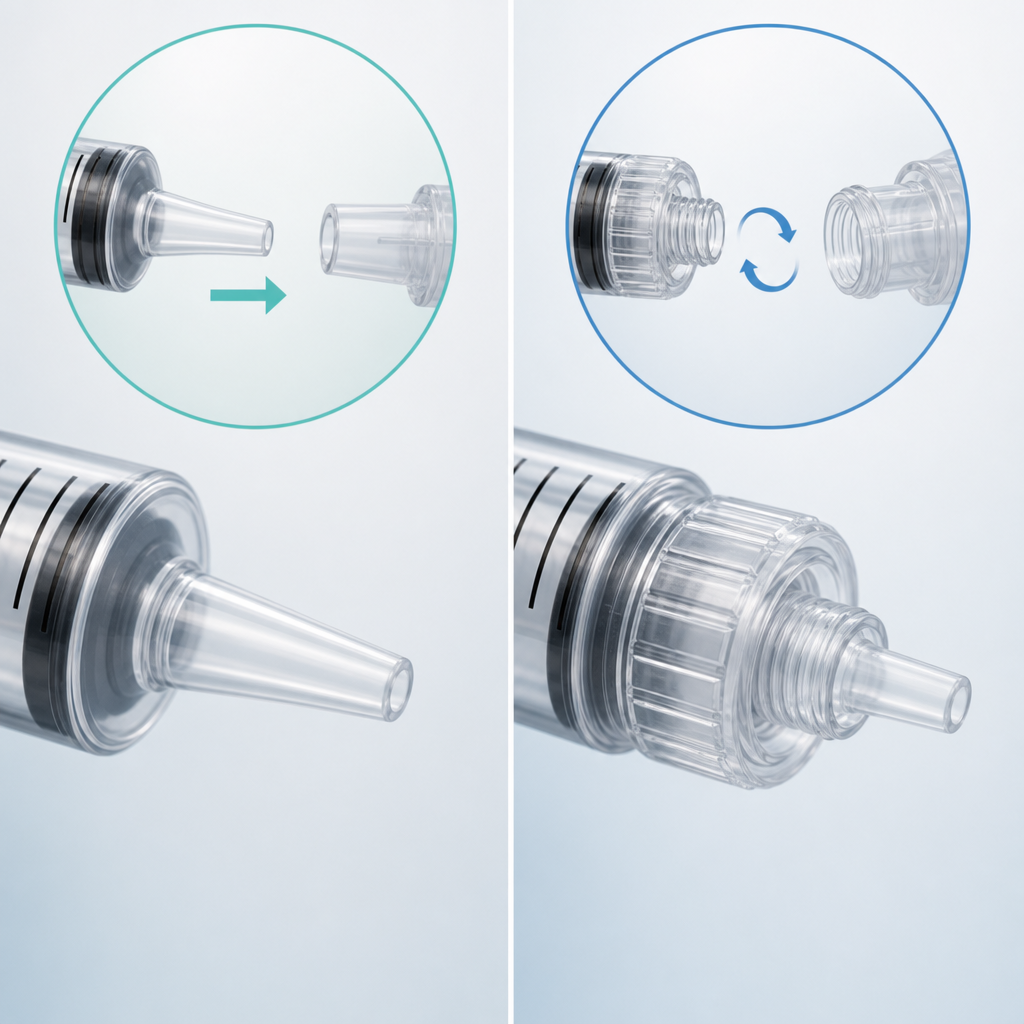
"Luer" is just the standard fitting size used across syringes and needles worldwide, so parts from different brands fit together. There are two flavors:
- Luer lock — a threaded collar that the needle screws into. It locks on and won't detach under pressure.
- Luer slip — a smooth cone the needle simply presses onto. Faster, but can pop off.
Attaching a needle, step by step
Identify your fitting
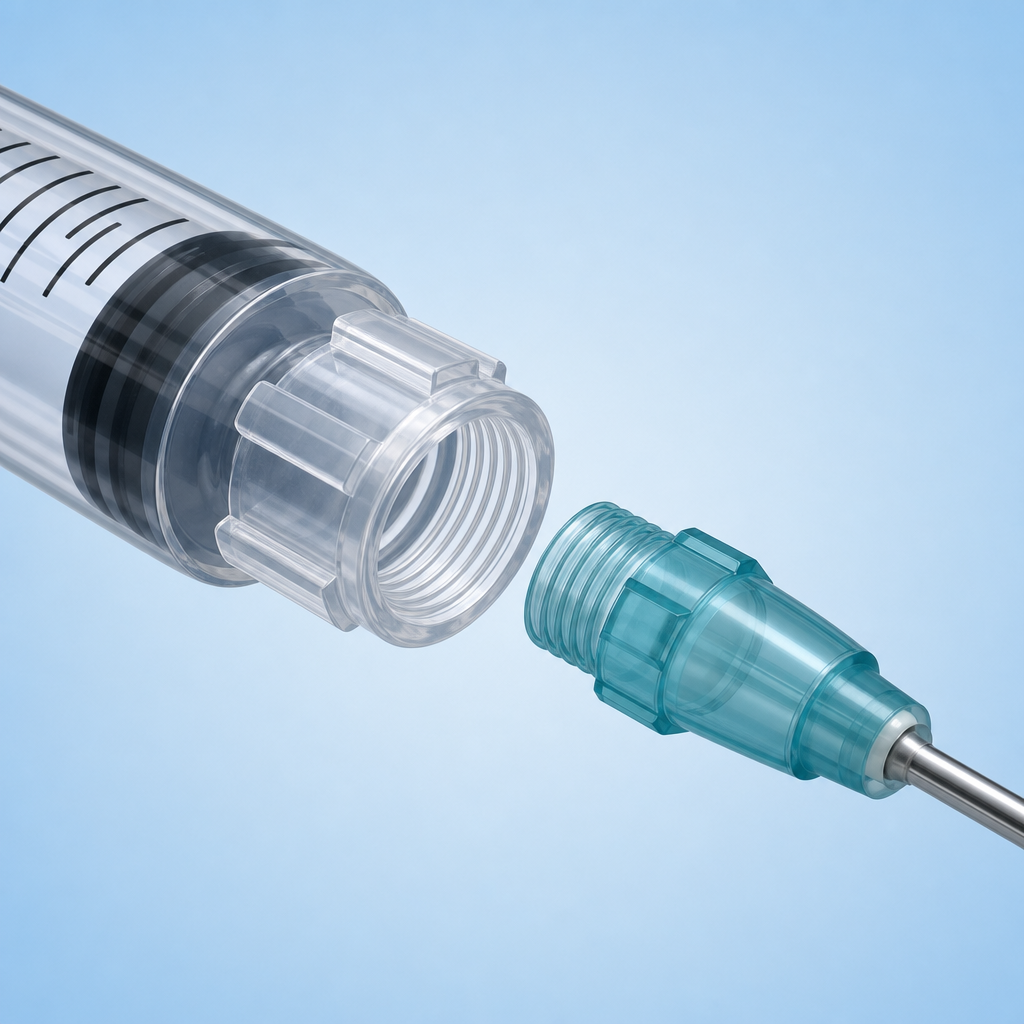
A luer lock has a threaded collar around the tip — a small plastic ring with internal screw threads. A luer slip is just a smooth cone. Lock fittings twist together and won't pop off under pressure; slip fittings just push on.
Line up the needle hub
Take your needle (still capped) and set its hub against the syringe tip. The hub has matching threads that catch the collar on the syringe. Keep everything sterile — don't touch the tip or the hub opening.
Twist to lock (righty-tighty)
Turn the needle clockwise about a quarter to half turn until it seats snugly. Hand-tight only — you are not cranking a bolt. Over-tightening can crack the plastic or make it impossible to remove later.
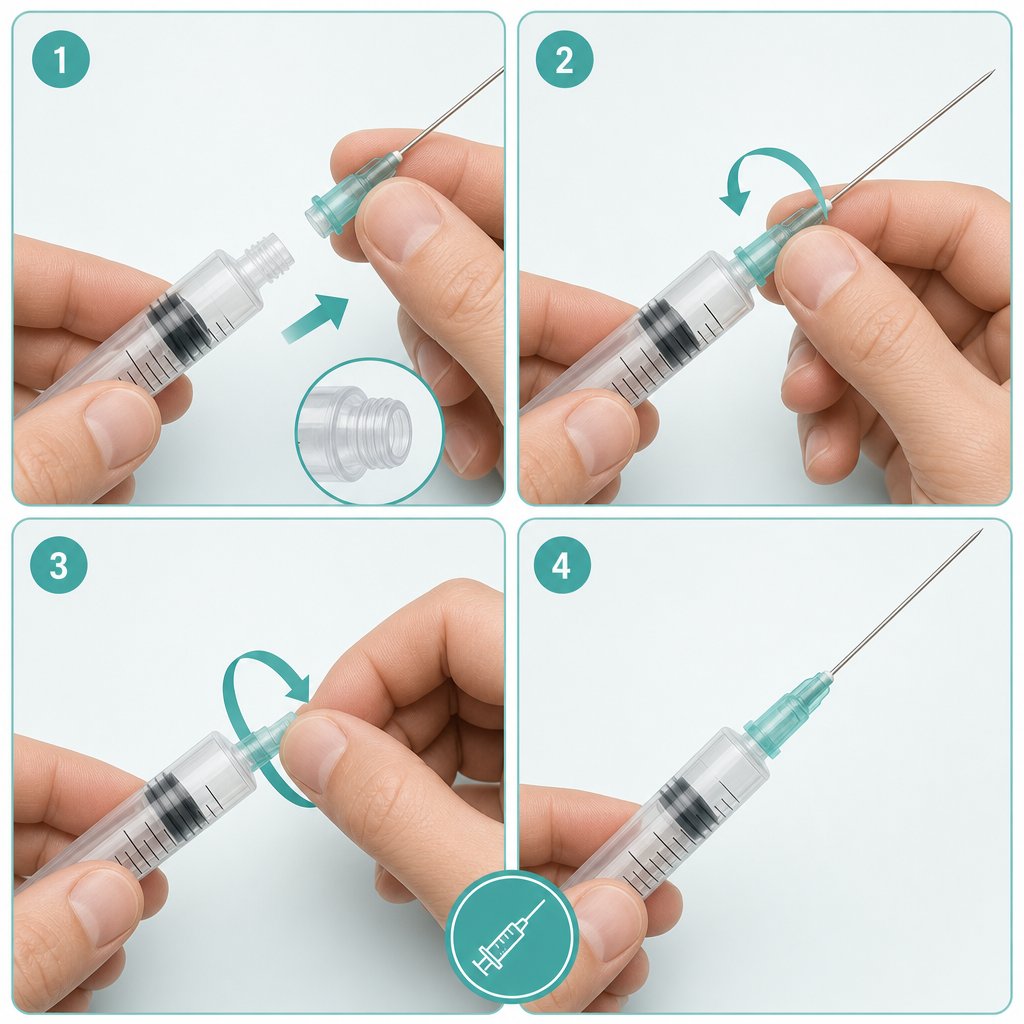
Uncap, use, then twist off
Pull the cap straight off to expose the needle. After use, twist counter-clockwise to remove and dispose of the needle safely in a sharps container. The locking thread means it comes off cleanly without the needle sticking.

Do
- ✓Hand-tighten only — snug, not forced.
- ✓Keep the tip and hub sterile; recap between steps if needed.
- ✓Twist clockwise to attach, counter-clockwise to remove.
- ✓Dispose of needles in a proper sharps container.
Don't
- ✕Don't over-torque — cracked plastic leaks and traps the needle.
- ✕Don't force a luer slip needle onto lock threads (or vice-versa).
- ✕Don't touch the exposed needle or reuse needles.
- ✕Don't leave a vial's stopper unwiped before drawing.
Got the needle on? Next: mixing your vial
Learn how reconstitution works and calculate exactly how much to draw with our interactive tool.
Reconstitution & Dosing GuideFor research and educational purposes only.